Airflow Docker Container - How to get started guide
Deploying Airflow with Docker and Running your First DAG
Based on content from: Getting Started with Airflow Using Docker, Mark Nagelberg
This rest of this post focuses on deploying Airflow with docker and it assumes you are somewhat familiar with Docker or you have read my previous article on getting started with Docker.
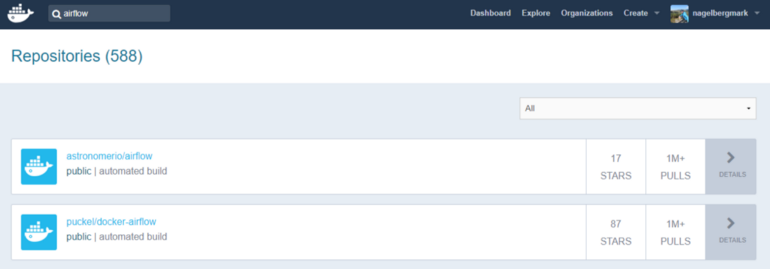
As a first step, you obviously need to have Docker installed and have a Docker Hub account. Once you do that, go to Docker Hub and search “Airflow” in the list of repositories, which produces a bunch of results. We’ll be using the second one: puckel/docker-airflow which has over 10 million pulls and almost 100 stars. You can find the documentation for this repo here. You can find the github repo associated with this container here.
So, all you have to do to get this pre-made container running Apache Airflow is type:
docker pull puckel/docker-airflow
And after a few short moments, you have a Docker image installed for running Airflow in a Docker container. You can see your image was downloaded by typing:
docker images
Now that you have the image downloaded, you can create a running container with the following command:
docker run -d -p 8080:8080 puckel/docker-airflow webserver
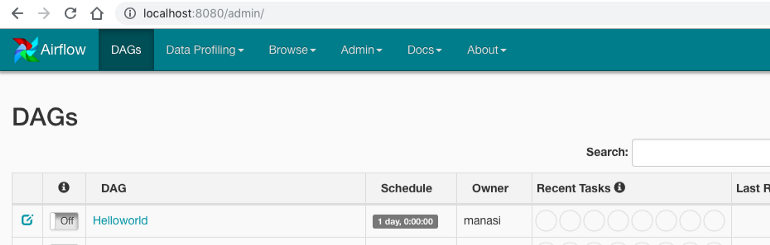
Once you do that, Airflow is running on your machine, and you can visit the UI by visiting http://localhost:8080/admin/

On the command line, you can find the container name by running:
docker ps
You can jump into your running container’s command line using the command:
docker exec -ti <container name> bash
(In my case, my container was automatically named competent_vaughan by Docker)
Running a DAG
So your container is up and running. Now, how do we start defining DAGs?
In Airflow, DAGs definition files are python scripts (“configuration as code” is one of the advantages of Airflow). You create a DAG by defining the script and simply adding it to a folder ‘dags’ within the $AIRFLOW_HOME directory. In our case, the directory we need to add DAGs to in the container is:
/usr/local/airflow/dags
The thing is, you don’t want to jump into your container and add the DAG definition files directly in there. One reason is that the minimal version of Linux installed in the container doesn’t even have a text editor. But a more important reason is that jumping in containers and editing them is considered bad practice and “hacky” in Docker, because you can no longer build the image your container runs on from your Dockerfile.
Instead, one solution is to use “volumes”, which allow you to share a directory between your local machine with the Docker container. Anything you add to your local container will be added to the directory you connect it with in Docker. In our case, we’ll create a volume that maps the directory on our local machine where we’ll hold DAG definitions, and the locations where Airflow reads them on the container with the following command:
docker run -d -p 8080:8080 -v /path/to/dags/on/your/local/machine/:/usr/local/airflow/dags puckel/docker-airflow webserver
The DAG we’ll add can be found in this repo created by Manasi Dalvi. The DAG is called Helloworld and you can find the DAG definition file here. (Also see this YouTube video where she provides an introduction to Airflow and shows this DAG in action.)
To add it to Airflow, copy Helloworld.py to /path/to/dags/on/your/local/machine. After waiting a couple of minutes, refreshed your Airflow GUI and voila, you should see the new DAG Helloworld:
You can test individual tasks in your DAG by entering into the container and running the command airflow test. First, you enter into your container using the docker exec command described earlier. Once you’re in, you can see all of your dags by running airflow list_dags. Below you can see the result, and our Helloworld DAG is at the top of the list.
The default physical location is $HOME/Library/Containers/com.docker.docker/Data/com.docker.driver.amd64-linux/Docker.qcow2 as @badonk mentioned. But you can change and specify a new “Disk Image Location” using Docker Desktop on your Mac as follows: Docker Desktop -> Preferences -> Disk [Tab] -> Move Disk Image. However, if you attempt to move the disk image to a location that already has one, you get a prompt asking if you want to use the existing image or replace it. You can find more information here on Docker official pages
Resources
- I was confused about whether you can create DAGs with the UI, and this Stackoverflow Thread seems to indicate that you can’t. Note in the answer the responder mentions a few potentially useful tools for developing a UI where users can define DAGs without knowing Python.
- This Stackoverflow thread was helpful for figuring out that volumes are the solution to add DAGs to Airflow running in a container.
- Official tutorial from Apache Airflow
- Common Pitfalls Associated with Apache Airflow
- ETL Best Practices with Airflow