Sync a GitHub repo to your GCP Composer (Airflow) DAGs folder
Josh Bielick, Follow Oct 2, 2018 ·
 In this guide we’ll use gsutil to sync your git contents to your airflow google storage bucket
Google Cloud Platform recently released a general-audience hosted Apache Airflow service called Composer. Airflow reads a configured directory recursively for all python files that define a DAG. When using GCP Composer, the DAGs folder is setup within a google cloud storage bucket for your Composer environment. In this post I’ll describe how we started syncing a git repo of our DAGs to this bucket so our Airflow environment always has the latest source. Some knowledge of Airflow is assumed in this tutorial, so if you haven’t already, head over to the docs and take a look at the concepts.
Getting started with Composer
Where are the DAGs?
You can upload files to this folder via the GCP console to try things out, but if you’re interested in a delivery pipeline from git to production, you’ll soon be looking for an automated solution to sync your git repository contents (your DAGs) with the google cloud storage bucket that contains the Compose dags/ folder. That dags/ folder is what the Airflow server and scheduler reads so it always has up-to-date source of your DAGs.

Furthermore, each container running your Compose environment has that Google Cloud Storage bucket mounted inside of it as a GCS FUSE two-way link between the host and the GCS bucket located at $GCS_BUCKET (also defined in the container). Cool. That means all we have to do is sync our git contents with the dags/ folder and we’re all set.
How do we deploy our code to the bucket?
Fortunately, gsutil includes an extremely helpful rsync implementation that allows us to copy a directory and its contents recursively, write them to a cloud storage bucket destination, delete existing files from the destination not present in the source directory, and parallelize the writes to the bucket. This was a clear winner for deploying our DAGs.
How do we automate the build?
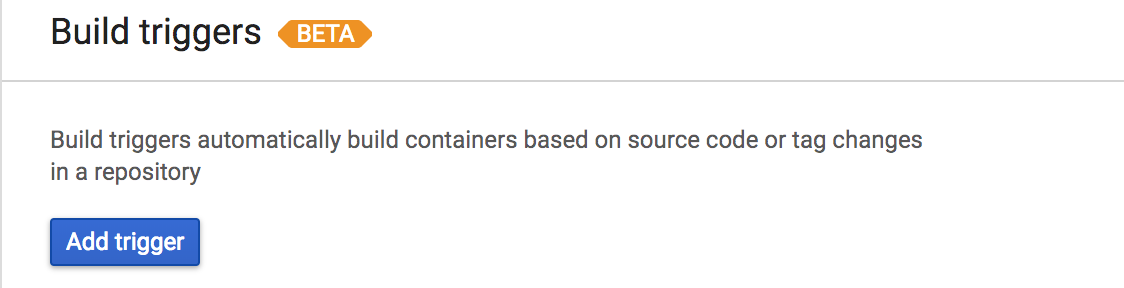
Google Cloud Platform also rolled out a build tool recently named Cloud Build, which allows you to create a trigger on your repo’s remote host and run a build script as a result. This is exactly what we’ll do.
Head over to the Cloud Build dashboard in the Cloud Console and add a new trigger.
Connect your SCM remote host as the setup process prompts you to and pay close attention to the trigger settings page after selecting the repository you’d like to use for deploying your DAGs.
If you’d like the master branch deployed whenever it changes, set the trigger type to be “branch” and enter master for the branch regex.
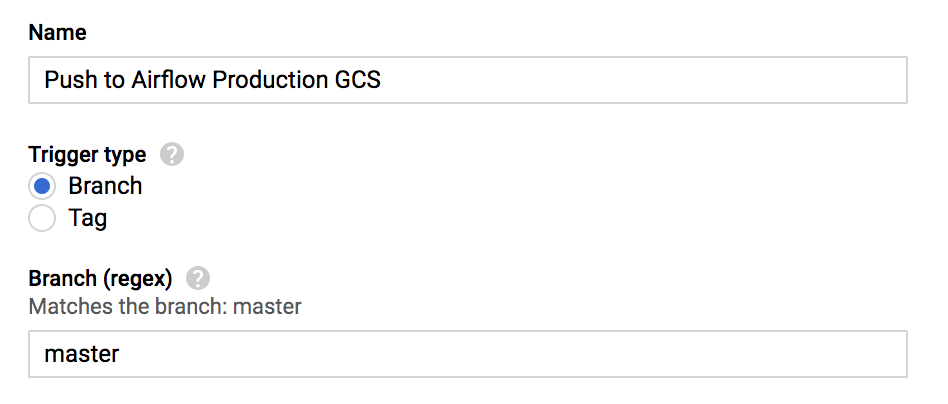
This configuration will only trigger a build when the master branch changes.
We decided earlier that we could deploy our files to the DAGs bucket folder with gsutil rsync. Cloud Build offers two methods for building—a Dockerfile-based build and a cloudbuild.yaml. Our build process will be comprised exclusively of a gsutil command execution and we don’t need a docker image so we’ll select cloudbuild.yaml for our build configuration.

Next, create this cloudbuild.yaml file in the root of your repo. The contents will be instructions for the Cloud Build executor where we will write our gsutil command. The rest of this tutorial assumes your git repository has at least the following structure (in bold):
.├── cloudbuild.yaml
├── dags
│   └── my_dag.py ... etc
└── plugins
Here’s what the cloudbuild.yaml will look like:
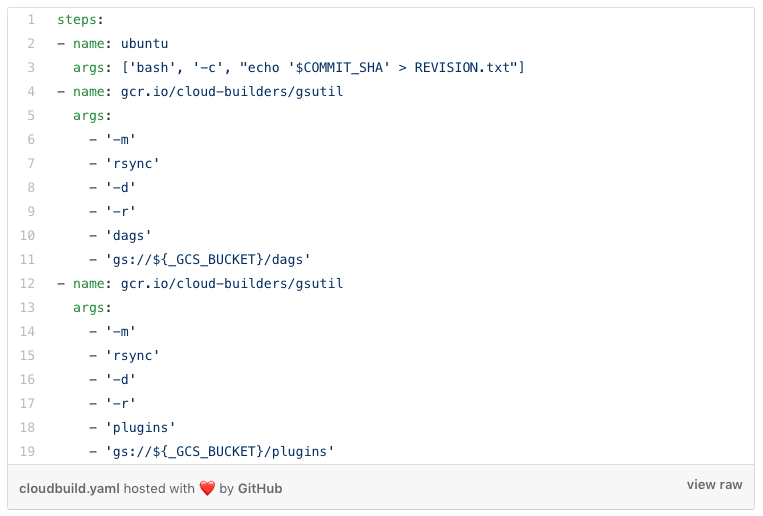
- Output the value of the env variable
COMMIT_SHAto a file namedREVISION.txtto the current working directory. This is just for debugging—you can omit this step if you want. - Run
gsutil rsyncon the current working directory with the following flags:-m, which enables parallel uploading;-d, which performs deletes on the destination to make it match the source; and-r, to recurse into directories. The last two arguments are the source and destination. The source directory is./dags, and the destination is a Google Storage location which follows the formatgs://mybucket/data. - Do step 2 again, but for the
plugins/folder in our repo. This will sync to the DAG bucket/pluginsfolder, where you can place airflow plugins for your environment to leverage.
${_GCS_BUCKET} is Cloud Build user-defined variable substitution, allowing us to provide the bucket name in the Cloud Build UI as a “Substitution Variable”. Define this substitution variable in the Cloud Build UI form like the below:
Install gsutil
This page describes the installation and setup of gsutil, a tool that enables you to access Cloud Storage from the command-line.
-
The gsutil tool runs on Linux/Unix, Mac OS, and Windows (XP or later).
Installing gsutil

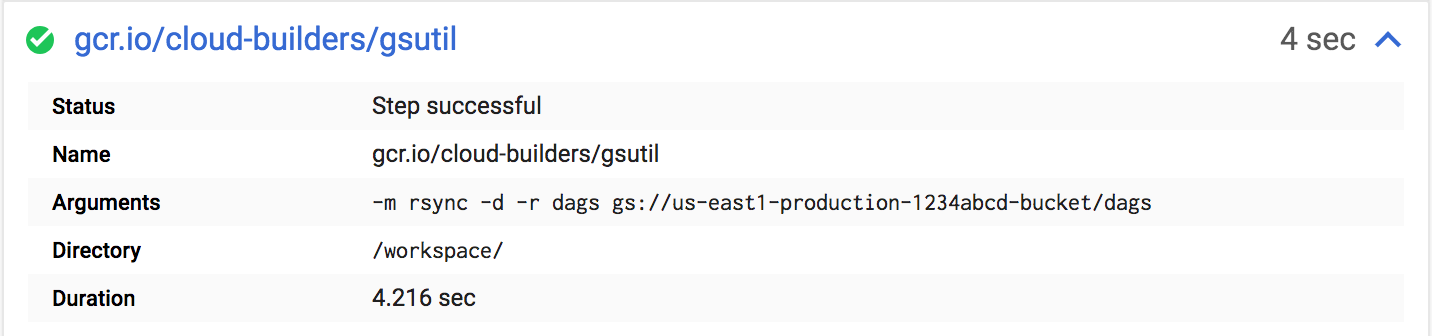
Save your Cloud Build trigger, make a commit to master to trigger a build, and wait for Cloud Build to start on the “View triggered builds” page for your trigger. You can watch the log output of the build as gsutil copies files to the bucket and once it’s done, your repo contents will be reflected in your GCS bucket.