Vestax PBS-4 Church Broadcast
Open Broadcaster Software (OBS) - Used to do PIP and and switch between a slide show before the meeting, full camera views of speakers and stand and PIP for showing the text of Hymns while also showing video of the music conductor.
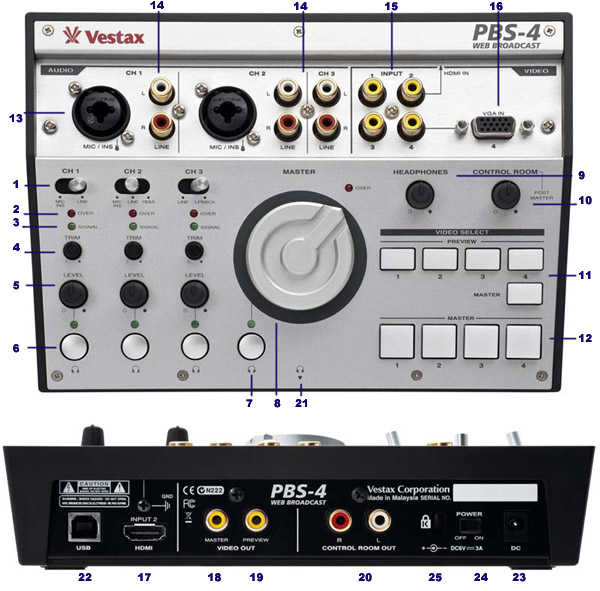
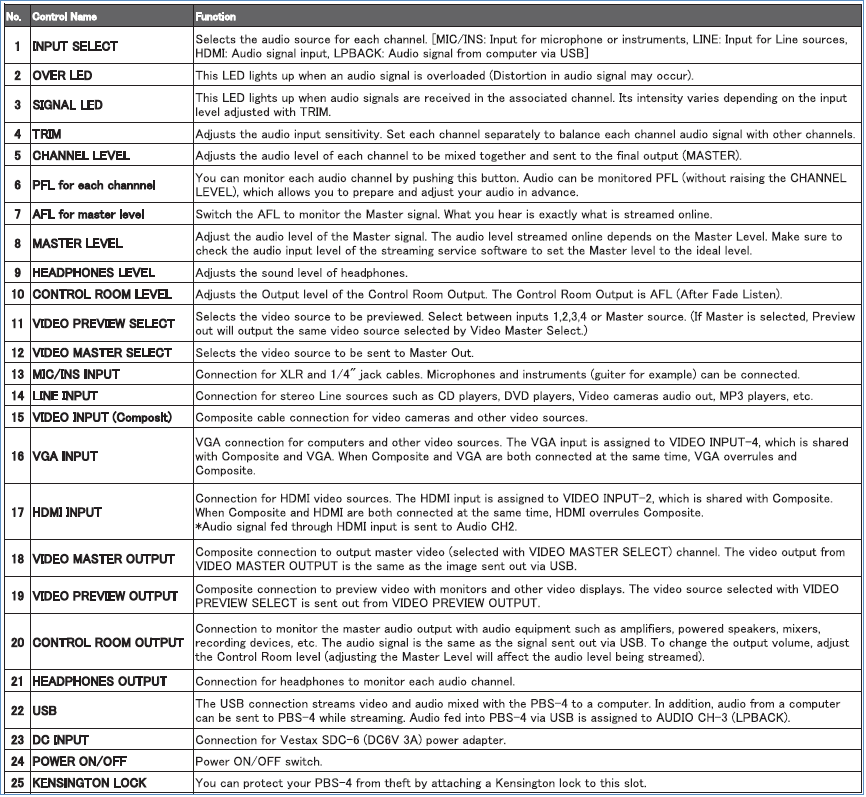
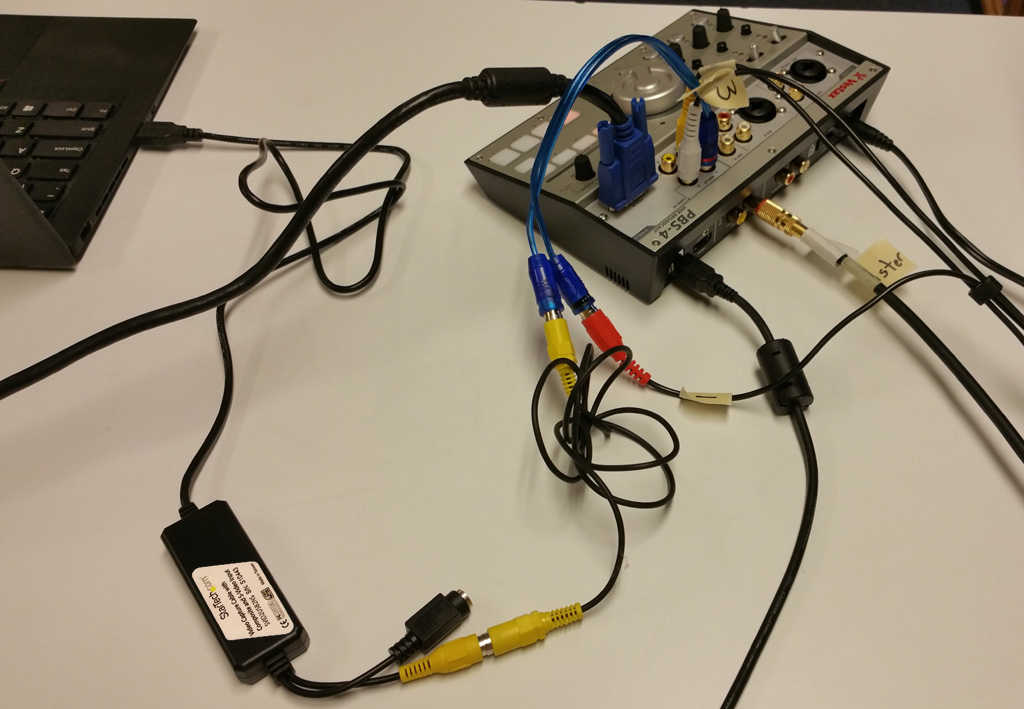
Vestax PBS-4 - Used to mix 3 cameras and input on VGA from a Computer with Text for Hymns, for sing along at stake centers.
Demo Video

WebCaster Installation
Step 1: Connect to the Internet
Step 2: Set up video/camera
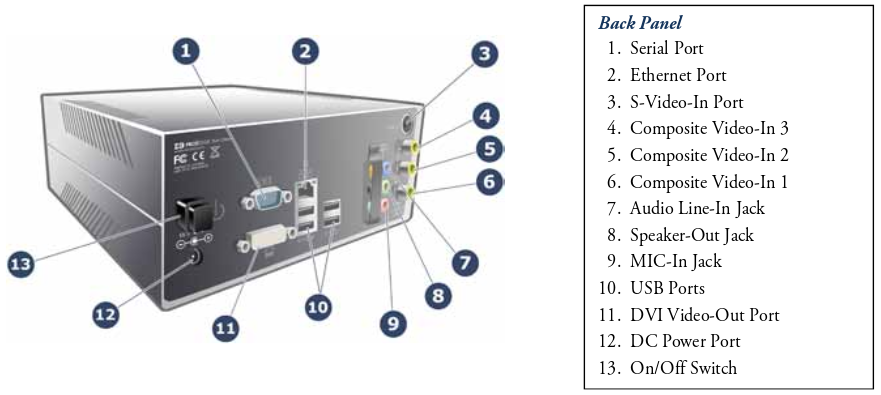
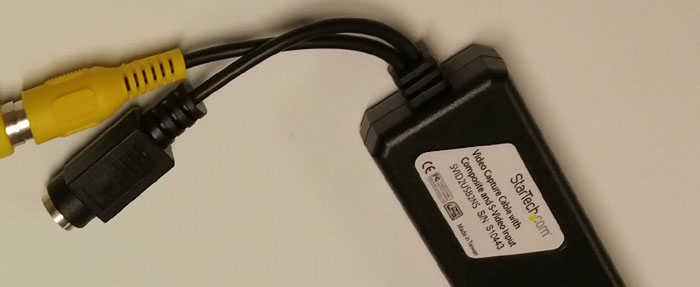
Connect the camera to the Webcast Communicator in one of two ways:
- Run the appropriate video cable (S-Video or Composite) from the camera’s “video out” to the corresponding “video in” located on the back panel of the Webcast Communicator.
- Using the appropriate cable (Composite or S-Video), connect the camera “video out” to a building video distribution system outlet. Video in the building video distribution system can be accessed from the satellite cabinet. Connect the video output to the appropriate “video in” port in the back of the Webcast Communicator.
Step 3: Set up audio
If the meetinghouse library has a satellite panel, set up your Webcast Communicator there since it is out of the chapel. This minimizes possible interactions with small children and others during the webcast. The location
is also close to components you will need to connect to the Webcast Communicator. Although this is the most complex option, it provides the best webcast production quality.
- Open the door to the satellite equipment rack.
- Locate the modulator that is used for chapel overflow. This is usually the highest channel number in the US. For example, if your rack has a channel 3 and a channel 10, and if channel 3 displays a picture while channel 10 does not, then the chapel output is probably on channel 10. The correct channel will show a picture when the camera is connected to the video input jack (located at the back of the chapel).
- Open the back of the rack and find the modulator for the back of the chapel overflow. (There should be three cables: RF out, video in, and audio in.)
- Unplug the “audio in” cable from the back of the chapel overflow modulator and plug it into one of the female connectors on the Y adapter.
- Plug the male connector from the Y adapter into the back of the chapel overflow modulator.
- Plug the Mini-to-RCA adapter (side with the male RCA) into the last connector on the Y adapter.
- Plug the Mini-to-RCA adapter (side with the 1/8 inch) into the “audio in” on the Webcast Communicator.
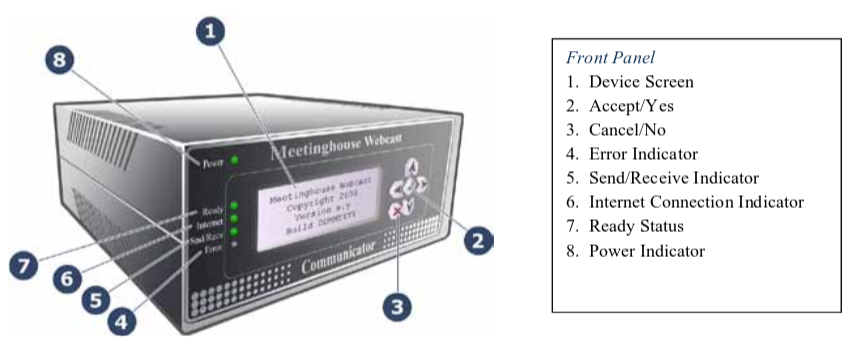
Step 4: Set up and test the Webcast Communicator
Prior to the event, turn on the Webcast Communicator and run a test webcast to ensure it is set up correctly.
- Select Create Webcast from the main menu.
- Select your Unit ID. If this is not a choice, select Add and put in your unit ID.
- Create a six-digit Event ID for your event and enter it into the Webcast Communicator.
- Select Video Source output (S-Video or Composite.)
- Select the Webcast Quality for your event.
- Select Test or Webcast if already tested.
- Have remote locations connect to the event (see pg. 19) and verify they can see the video and hear audio. Have someone talk at the pulpit so all receiving sites can verify audio. Make any necessary adjustments and click Accept to save the settings.
- Push X to end the test and return to the main menu.
- Select Shutdown from the main menu. If you do not shut down, the receiving sites could still connect to an empty feed.
If the test had poor video quality, run the test again, but select a different webcast quality setting. Repeat steps 1-6 until you have acceptable quality.
Using a computer to view a Webcvast
Open a Web browser and enter http://stream.lds.org/xxxxxx-yyyyyy, where xxxxxx is the unit ID and your event ID
is yyyyyy.
For example, if your unit ID is 525294 and your event ID is 010203, the URL would be http://stream.lds.
org/525294-010203.
| Attachment | Size |
|---|---|
| OSI-DOD-Model.jpg | 30.46 KB |
| uncheck.png | 55.88 KB |
| Greenleaf_0.jpg | 50.1 KB |
| Healthcare Management Tools.pdf | 225.76 KB |
| Certificate of Coverage. Plan 1.pdf | 906.43 KB |
| kaleb pic.jpg | 785.34 KB |
| kayden2 pic.jpg | 766.17 KB |